F5 Programmability Training > Class 1: Introduction to Automation & Orchestration > Lab Topology & Environments Source | Edit on
Amazon AWS Lab Environment Guide
Error
The AWS CFT is currently in testing and not complete. This notice will be updated as progress is made. This functionality should be available by Dec 1st 2017.
Warning
The AWS CFT will run in your account. The template includes components and instances that will incur a charge. This charge will be billed to your account.
You can use an Amazon CloudFormation Template (CFT) to launch your own lab environment in AWS. This guide assumes the following:
- Pre-existing Amazon AWS account
- Access to create AWS Instances and Resources
- You have created an AWS Key Pair:
- You will be responsible for all charges incurred
More information about AWS can be found here:
Task 1 - Determine your Source IP Address
The AWS lab environment restricts access based on your Source IP Address. We will use a website to determine your Source IP for use in the next Task.
Note
If your Source IP address changes you will lose access to your environment.
Perform the following steps to complete this task:
- Open a web browser window or tab and navigate to https://www.whatismyip.com/
- Copy the IP Address shown in the Your IP Address is: box into your clipboard
Task 2 - Launch the CloudFormation Template
Perform the following steps to complete this task:
Login to your AWS Management Console
Note
Access to the console is determined by your individual account setup.
If you are using a personal account you should be able to login using https://console.aws.amazon.com/console/home
If you are using a corporate account please contact your IT Help Desk.
Click Services at the top of the window. Then type
cloudinto the search box and look for the CloudFormation item. Click on the CloudFormation item:
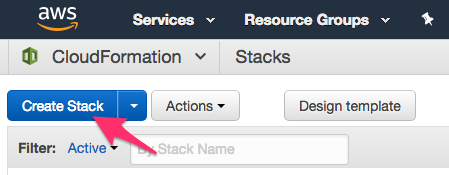
Click the Create Stack button:
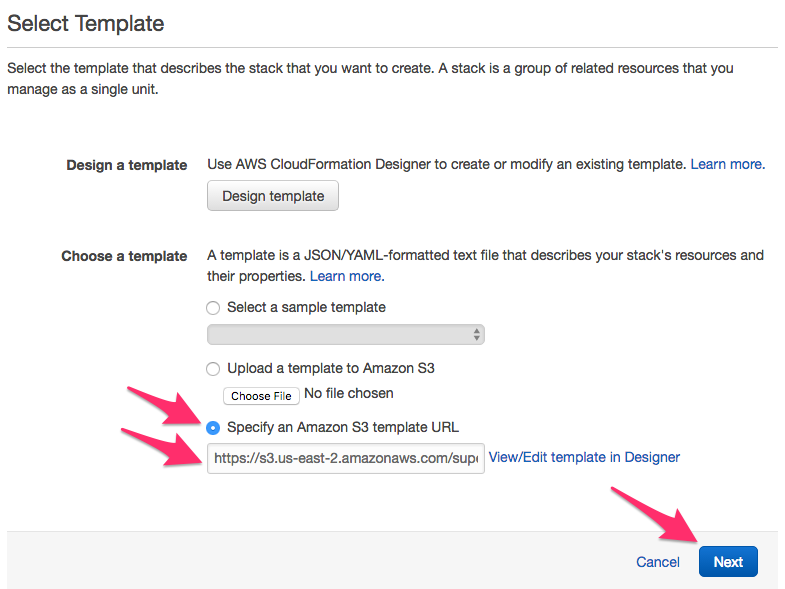
On the Select Template screen, select the Specify an Amazon S3 template URL option. Copy and paste the URL below into the box:
https://s3.us-east-2.amazonaws.com/supernetops-cf-templates/class1.templateClick on the Next button
Complete the form in the Specify Details screen:
Stack Name:
Super-NetOps-Labor a name of your choiceBranch:
masterInstanceType:
t2.mediumKeyName: Select your AWS Key Pair
UserIP: Paste the IP Address from Task 1 and add
/32to to the end.Note
You can also specify a CIDR formatted Subnet in this field
Click the Next button
On the Options screen click the Next button at the bottom of the screen
On the Review screen check the
I acknowledge that AWS CloudFormation might create IAM resources
with custom names
field and click the Create button at the bottom of the screen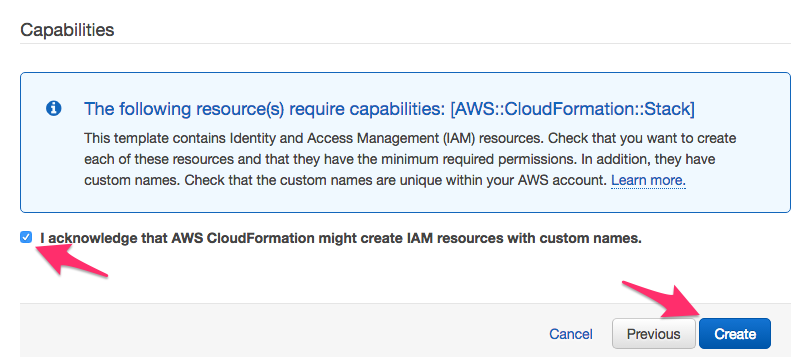
Click the
Super-NetOps-Labstack to view details of the deployment
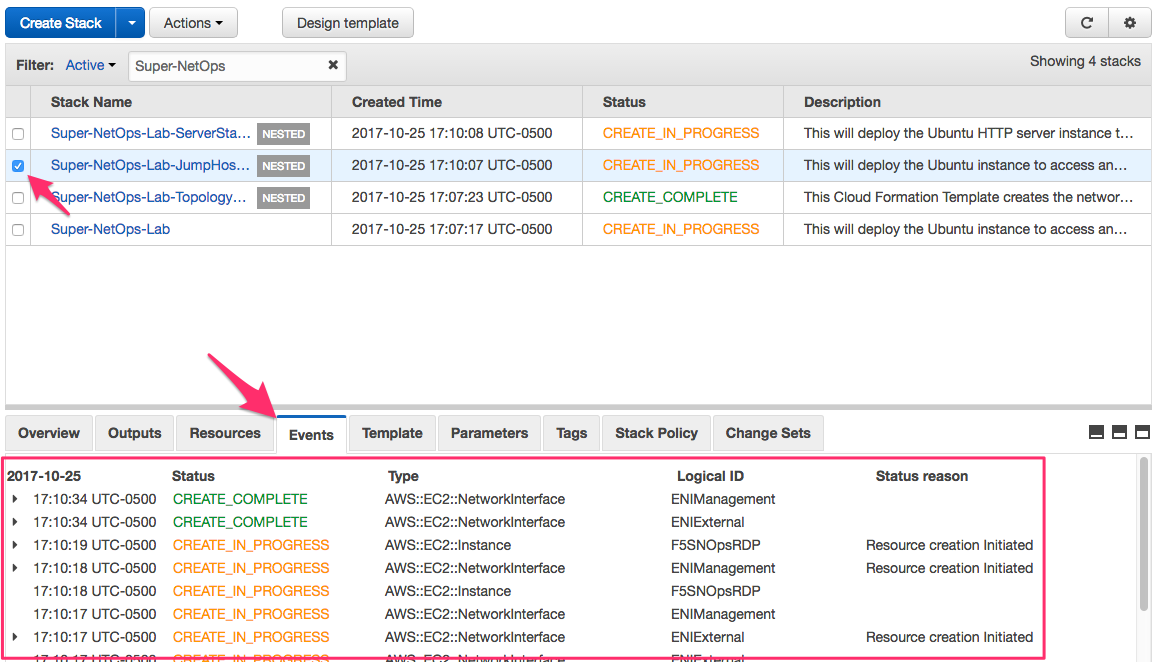
Monitor the Events section of the page as the Stack deploys:
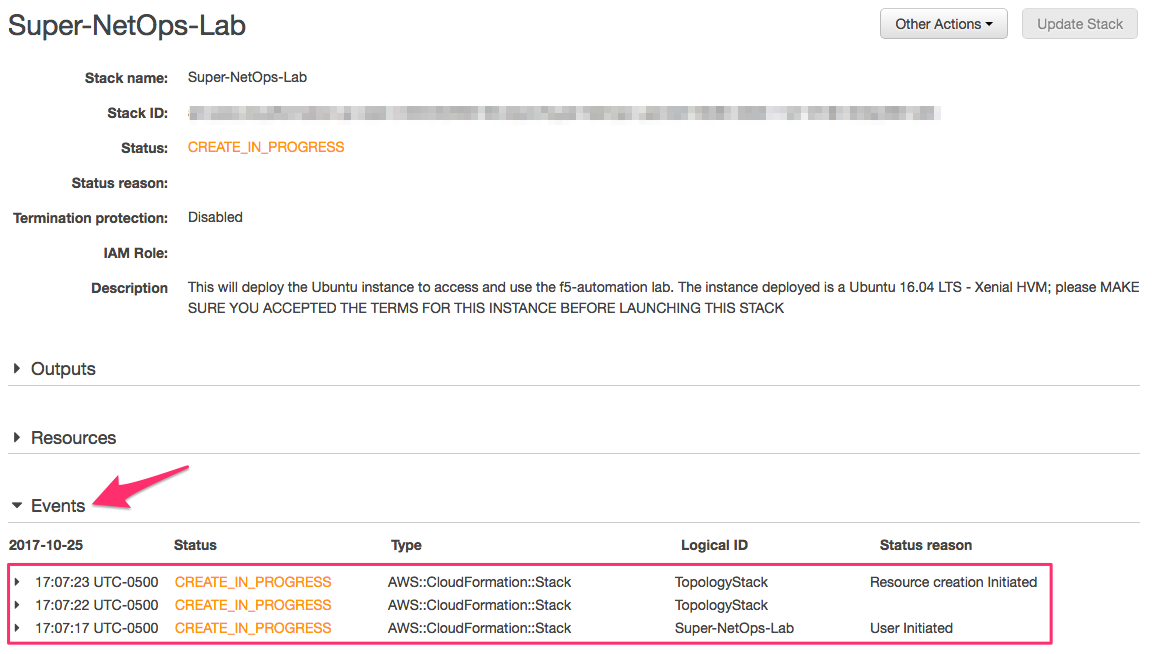
The CFT used performs a nested deployment, leveraging other CFT’s. The Events will notify you when new status messages are available. Total deployment time varies. As the Stack is being deployed you will see periodic
CREATE_COMPLETEmessages:
You can also go back to the page listing ‘Stacks’ and monitor the progress of the nested templates from there:

Once the Status of the
Super-NetOps-Labroot stack showsCREATE_COMPLETEclick the Outputs tab. You will see a Key namedJumpHostPublicIP. The Value is the IP Address you can use to connect to the Lab Jumphost using RDP, HTTPS or SSH (diagnostics only).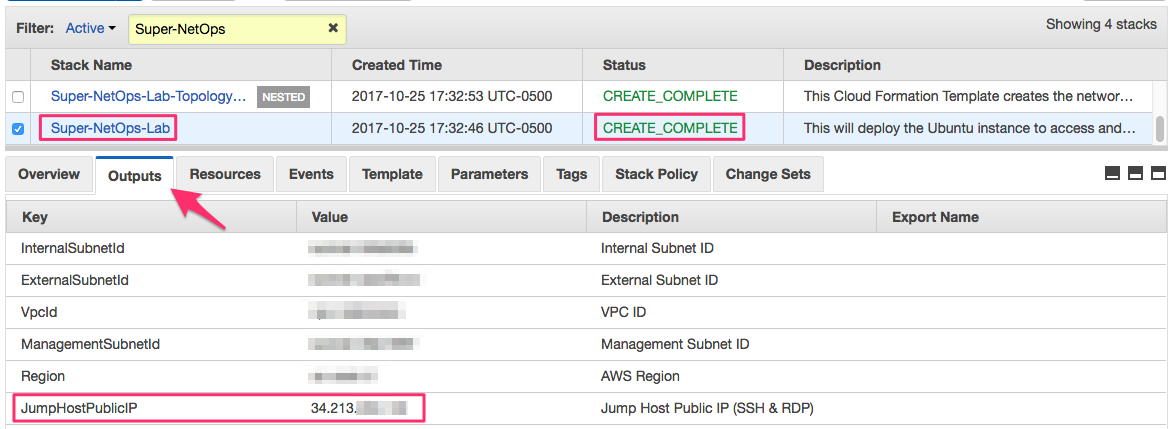
You can now connect to the Jumphost using RDP or HTTPS:
- RDP: Configure your RDP client to connect to the
JumpHostPublicIP - HTTPS: Use a HTML5 browser to connect to
https://<JumpHostPublicIP>
- RDP: Configure your RDP client to connect to the
Select how you would like to continue: