F5 Programmability Training > Class 1: Introduction to Automation & Orchestration > Module 3: Deploying AS3 Declarations with Ansible Tower Source | Edit on
Lab 3.3: Modify AS3 Apps using Tower
At this point we have deployed full Applications with Tower and AS3 but have not modified an application after it was deployed. In this Lab we will focus on Adding, Removing, and Replacing Pool Members using AS3 PATCH through Tower. We will also demonstrate updating SSL Certificates on an existing Virtual.
Note
Ensure that you ran the Tenant1_Deploy_Config
Template again with the f5-https-offload-app option as indicated at
the end of the last Lab.
Task 1 - Adding a Pool Member using Tower
Just like our Deployment Job Templates, modification Job Templates also utlilize both Playbooks and Jinja2 templates.
Open the Ansible Tower GUI in Chrome by navigating to
https://10.1.1.12and login usingT1-ops-user/defaultcredentials.Navigate to the Templates section in the Web UI. Notice the difference in Templates available to the Operations User. This is where breaking up roles to match your orginization can really add value when using Tower. There can be Templates designated for Security, Network Admins, App Owners, etc.
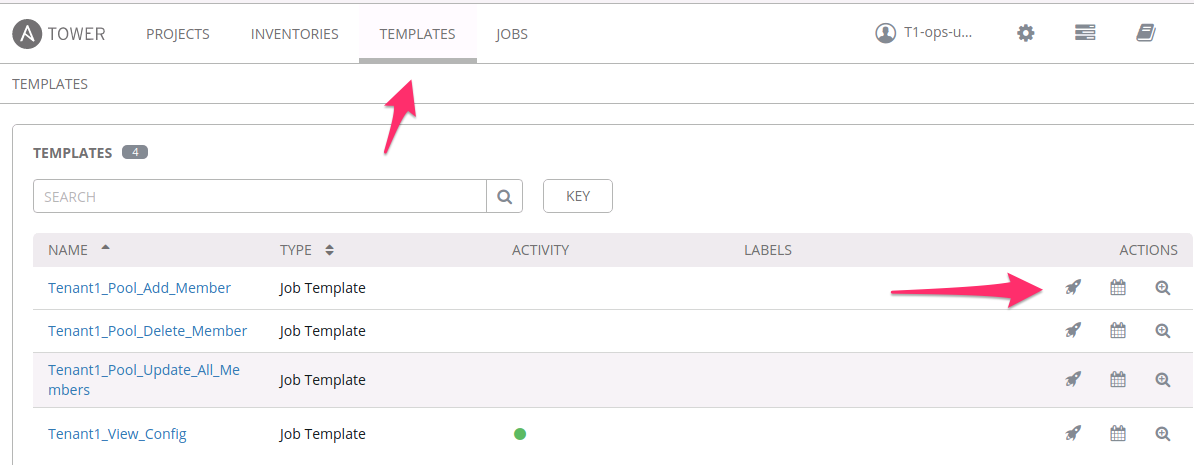
Select the
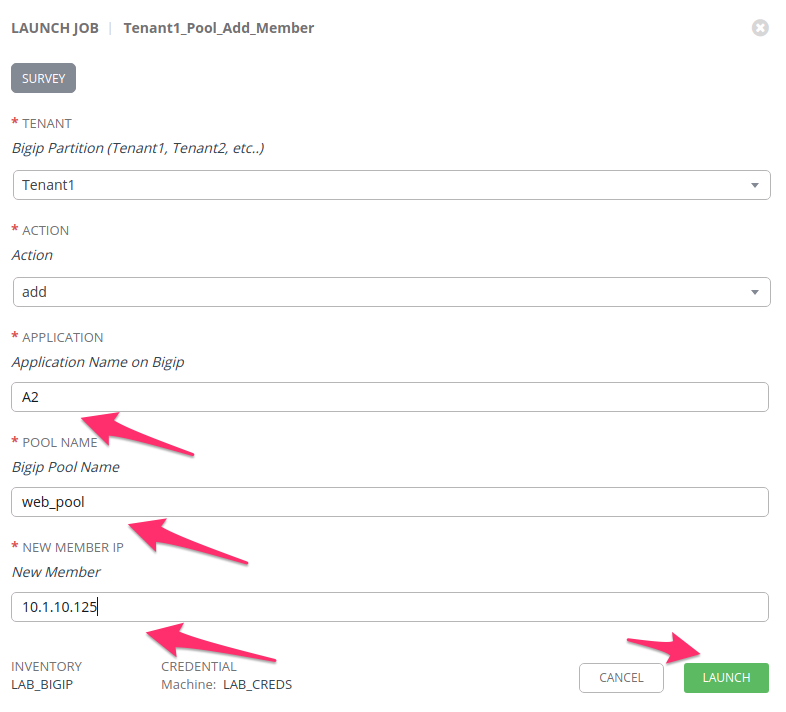
Rocket-Ship Iconnext to the Template titledTenant1_Pool_Add_MemberA Survey will appear asking you to specify the following fields and press LAUNCH:
- Application: This is the AS3 Application Name: Enter
A2 - Pool Name: Name of the App Pool: Enter
web_pool - New Member: IP of new Pool Member: Enter
10.1.10.125
- Application: This is the AS3 Application Name: Enter
Once you see the
Status Successmessage on the Job Output open a Chrome window/tab to the BIG-IP A GUI athttps://10.1.1.10and login withadmin/admincredentials. Navigate to . Make sure to selectTenant1Partition in the top right hand corner to view your AS3 Tenant. You should seeweb_poollisted with3members in the pool.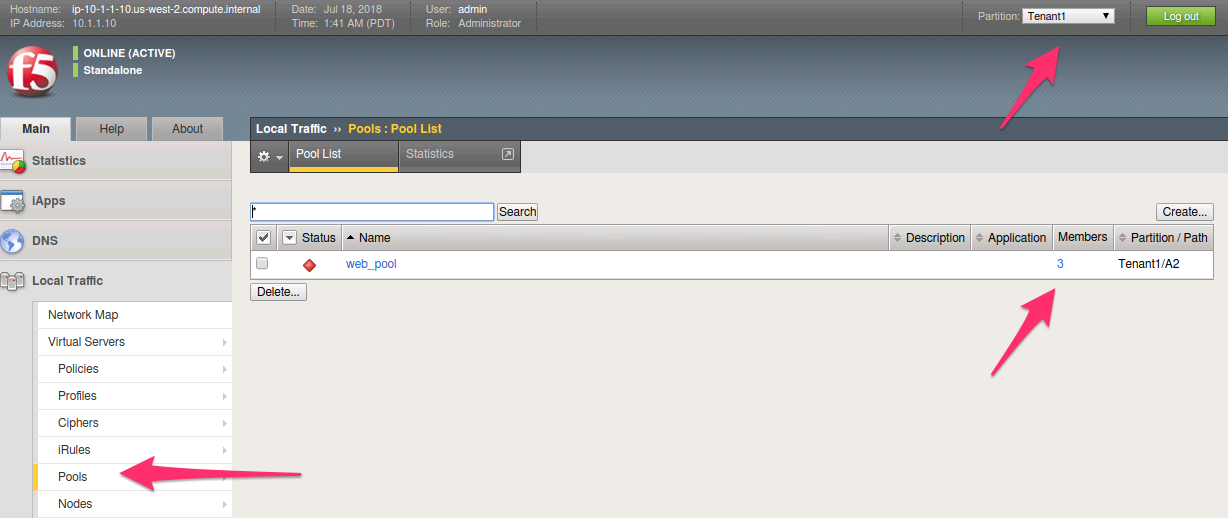
Click on the 3 pool members to see the one we just added.

Task 2 - Removing a Pool Member using Tower
Navigate to the Templates section in the Web UI and Select the
Rocket-Ship Iconnext to the Template titledTenant1_Pool_Delete_Member.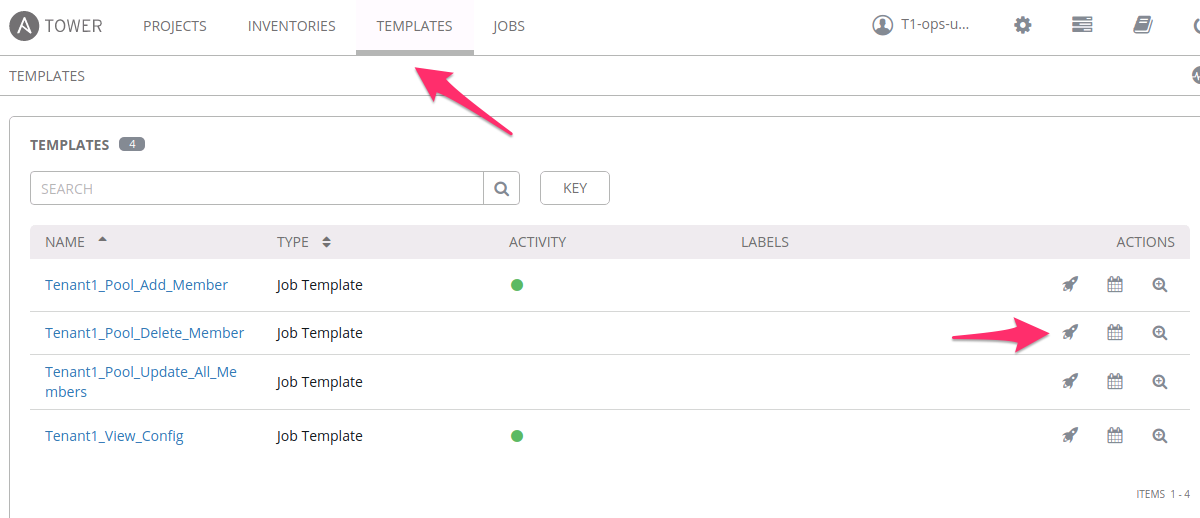
A Survey will appear asking you to specify the following fields and press LAUNCH:
- Application: This is the AS3 Application Name: Enter
A2 - Pool Name: Name of the App Pool: Enter
web_pool - Index of Member: IP of new Pool Member: Enter
2
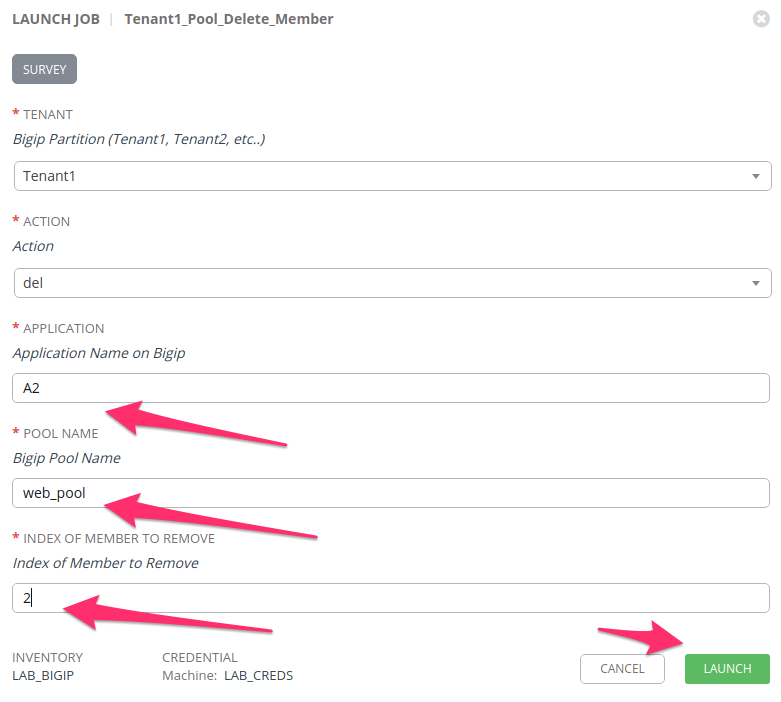
- Application: This is the AS3 Application Name: Enter
Once you see the
Status Successmessage on the Job Output open a Chrome window/tab to the BIG-IP A GUI athttps://10.1.1.10and login withadmin/admincredentials. Navigate to . Make sure to selectTenant1Partition in the top right hand corner to view your AS3 Tenant. You should seeweb_poollisted with2members again in the pool.You have now successfully Added and Removed
10.1.10.125from the AS3 Application using Ansible Tower.
Task 3 - Replacing all Pool Members
This task is similar to the Replace-All-With tmsh feature. The template will
take extra-vars as input and will replace all current members in the pool
with the ones that are provided during the Template execution.
Navigate to the Templates section in the Web UI and Select the
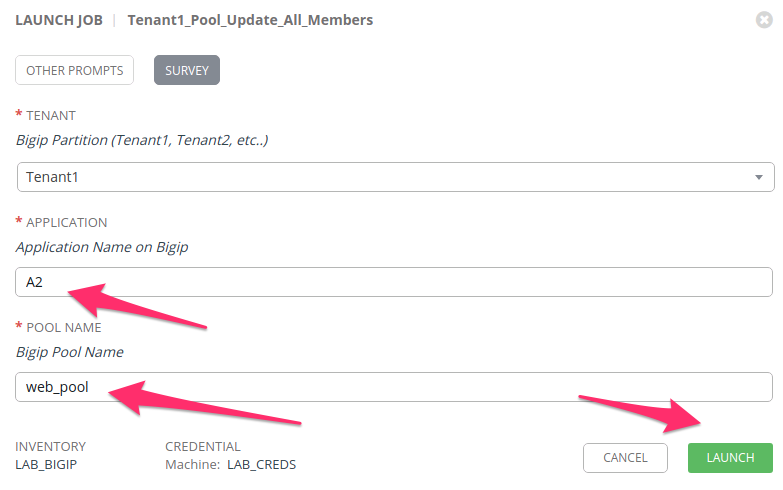
Rocket-Ship Iconnext to the Template titledTenant1_Update_All_Members.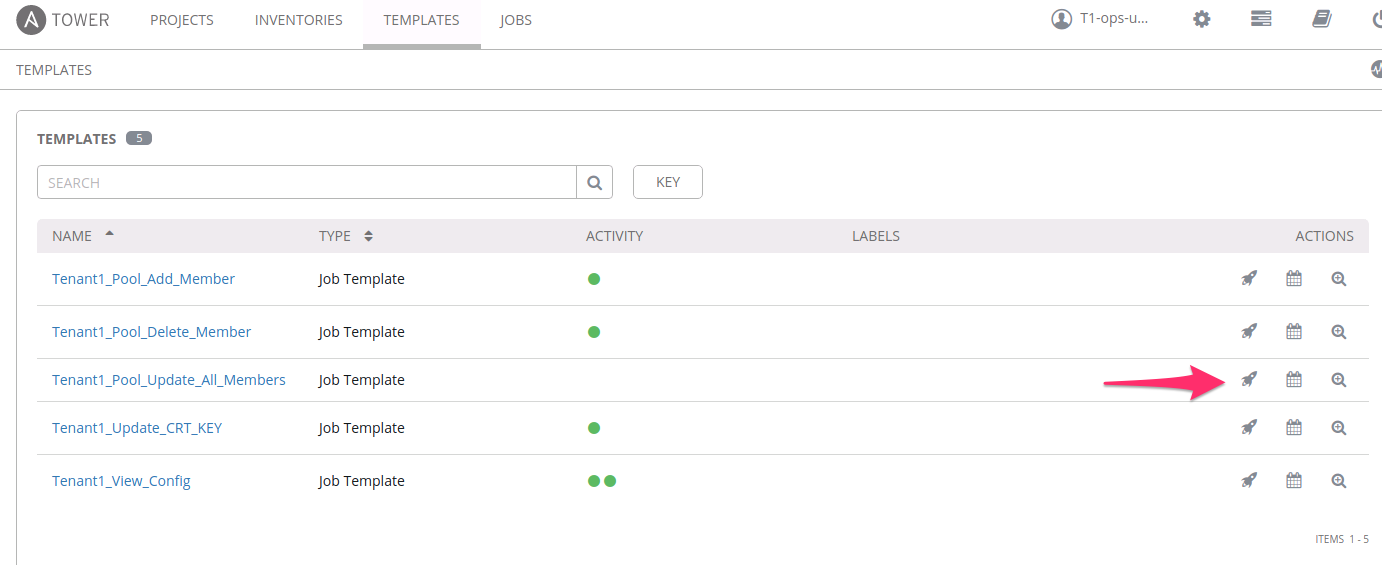
Before the Survey launches this time, Tower will ask you to fill in
extra-vars. Thisvarswill represent how you would like the pool to be after the Template pushes. You can add or remove members from the blank as long as the syntax is followed. In this example we are Replacing the existing members with the same IP but now port 8001 instead of 80.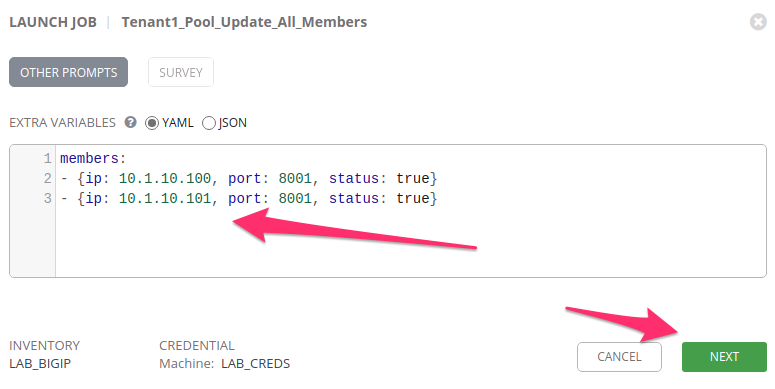
Select
NEXTand the Survey will appear asking you to specify the following fields and then to press LAUNCH- Application: This is the AS3 Application Name: Enter
A2 - Pool Name: Name of the App Pool: Enter
web_pool
- Application: This is the AS3 Application Name: Enter
Once you see the
Status Successmessage on the Job Output open a Chrome window/tab to the BIG-IP A GUI athttps://10.1.1.10and login withadmin/admincredentials. Navigate to . Make sure to selectTenant1Partition in the top right hand corner to view your AS3 Tenant. You should seeweb_poollisted with2members again but with the ports as 8001.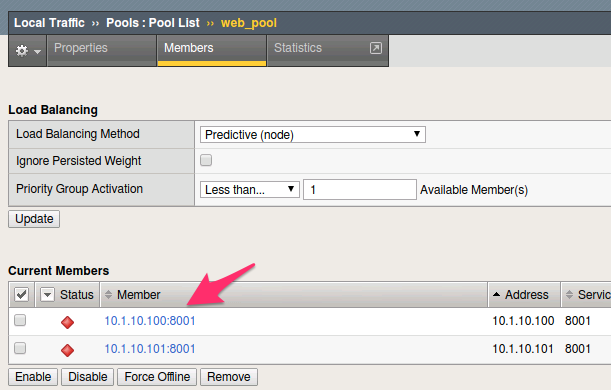
Task 4 - Updating the SSL CRT/KEY on a VIP
Following the same process as the last three tasks, login to Tower and run the Tenant1_Update_CRT_KEY Template. For this example we have prefilled the CRT and KEY into the Survey to avoid mistakes when copying the files. You must still fill in the
Applicationname asA2.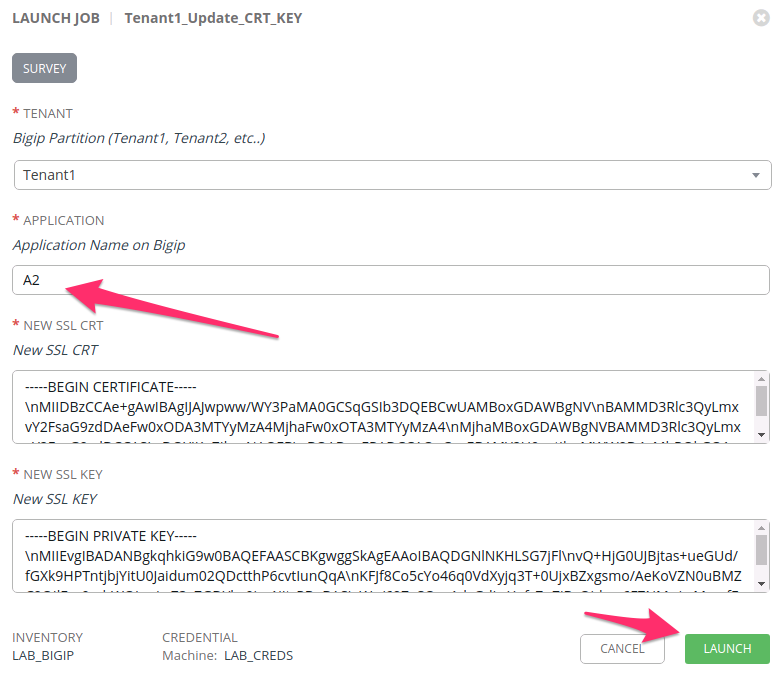
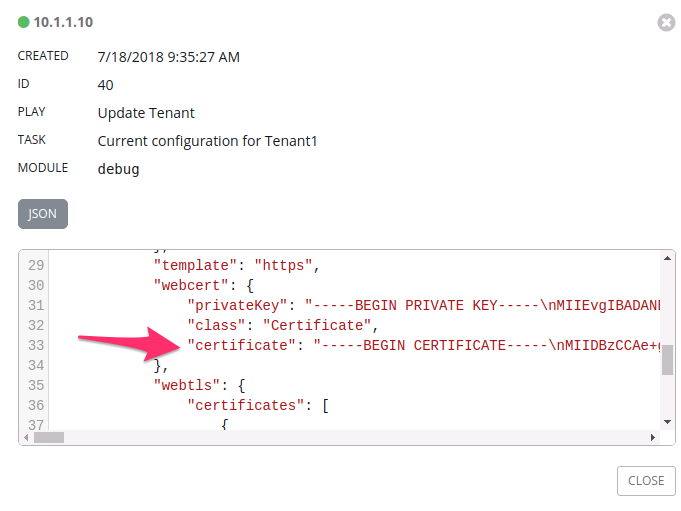
After the State shows as
Successfulyou can retrieve the updated AS3 declaration by running theTenant1_View_Config. The output will shows the new certificate in the JSON output of the Job Page.